WordPress on your own cloud server: getting started with SpinupWP
In this tutorial, I’ll explain how to create your first WordPress website with SpinupWP. Among other things, we discuss how to create an account with SpinupWP, how to order a cloud server and how to link the two together. Next, we are going to put a WordPress website live.
What is SpinupWP?
SpinupWP is a cloud-based server management tool that helps users set up and manage their own cloud servers for hosting WordPress sites. It partners with popular cloud service providers such as DigitalOcean, Vultr and Hosting.NL. The platform automates many server management tasks, making it easier for developers to focus on building and maintaining WordPress sites without worrying about the technical aspects of server management.
Benefits for agencies developing websites
- Fast Deployment: SpinupWP allows agencies to quickly set up new WordPress sites on cloud servers, reducing the time it takes to launch projects.
- Automation: The platform automates many tasks such as server security, backups, and software updates, allowing developers to spend more time on development and design.
- Cost savings: By using cloud servers instead of traditional hosting, agencies can save costs and benefit from the scalability and flexibility of cloud solutions.
- Performance: SpinupWP optimizes the server configuration for WordPress, resulting in faster loading times and better website performance.
- Security: The platform offers advanced security measures such as automatic updates, firewalls, and secure connections, making WordPress sites better protected against attacks.
- Ease of use: SpinupWP has a user-friendly interface that makes it easy for both developers and non-technical users to manage servers and Web sites.
Getting started with SpinupWP
- Create an account with SpinupWP. Go to https://spinupwp.com and click on Start a Free Trial
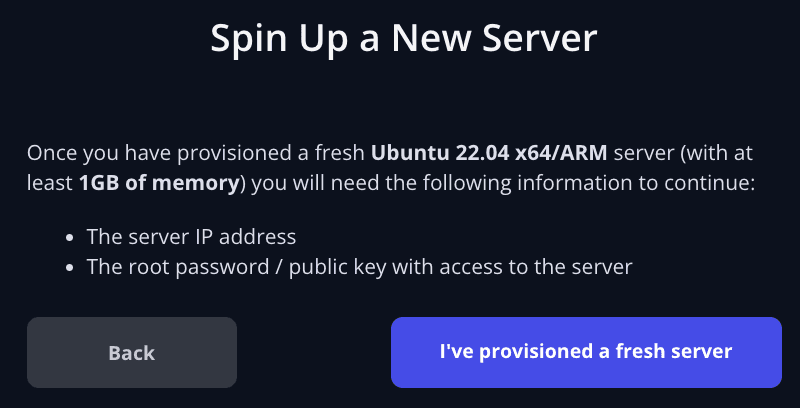
- From the Spin Up a New Server menu, choose Other provider and then click I’ve provisioned a fresh server.

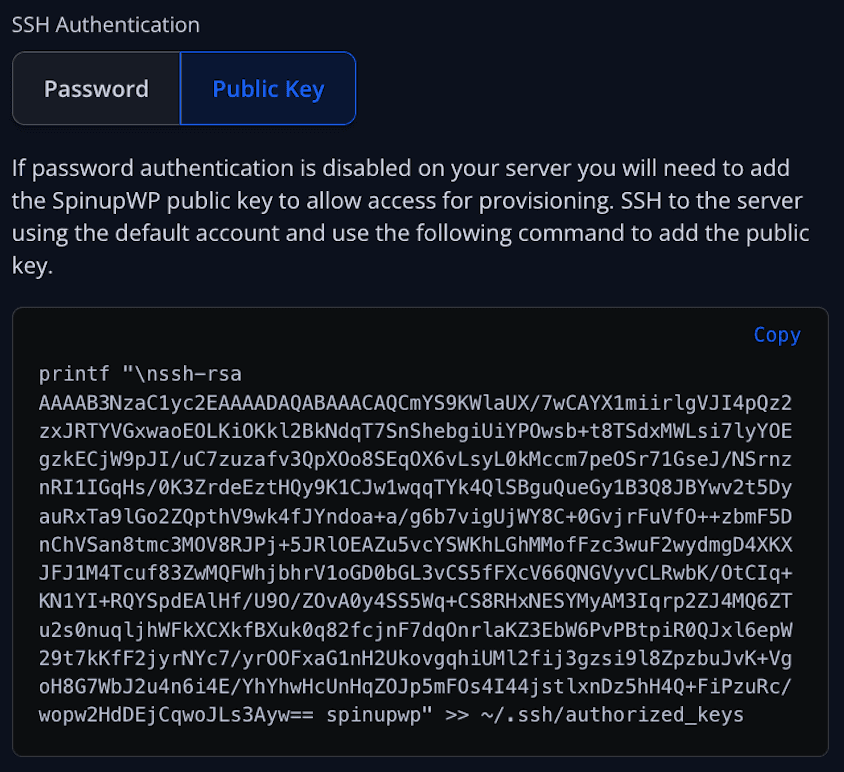
- Write down SpinupWP’s public SSH key. SpinupWP needs access to the cloud server. You will add the copied public key in a moment while creating the cloud server. Click on Public Key and then copy the contents from ssh-rsa to spinupwp (i.e., do not idenfy and stop at ” >>)

- Order your cloud server (but don’t complete your order yet). SpinupWP only requires 1GB of memory to start with, click here to get started right away with the smallest possible configuration or configure your server all by yourself.
- Name your server and add the public SSH key to your server. In your cart, click the Options link.

- Add the public SSH key. Scroll to the SSH Public Key field and paste into it the SSH key saved in step 3.
Then click Continue and then I’m going to order.
- Your cloud server is now being created. Within minutes you will receive an email titled Your new VPS is ready for use. Proceed to the next step once you receive that email.
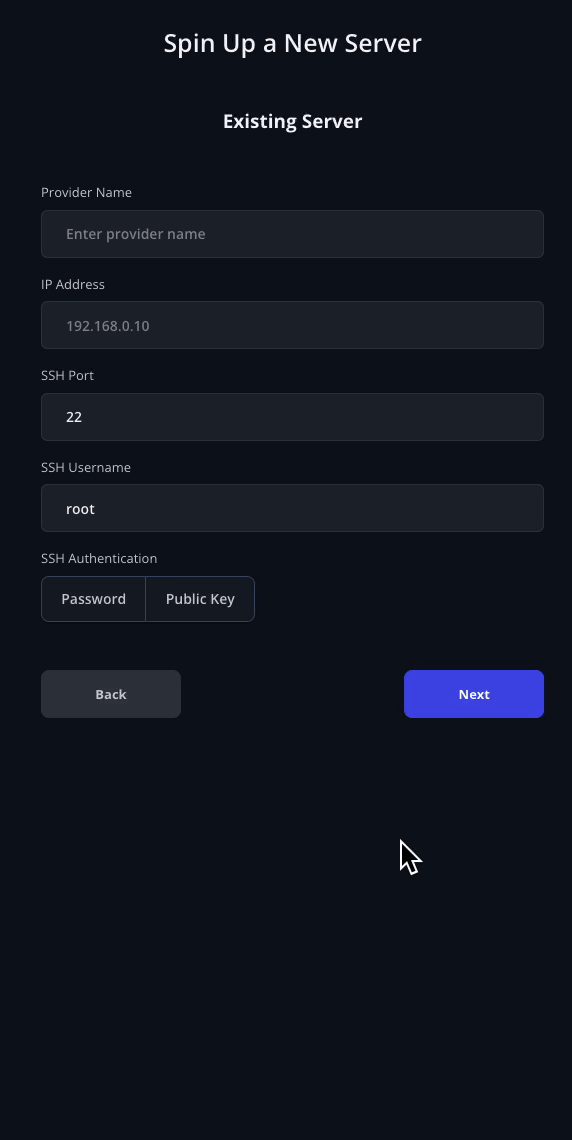
- Add the cloud server to SpinupWP. Return to the Spin Up a New Server screen from Step 3 and fill in the following fields there:
- Provider Name: Hosting.NL
- IP Address: the ip address of the cloud server, found in the email Your new VPS is ready to use and/or in your Dashboard.
- SSH Username: ubuntu
- (already done in step 3) Make sure Public Key is selected

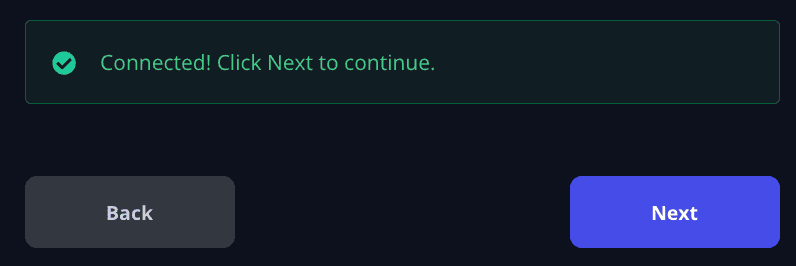
- Click Next to establish the connection

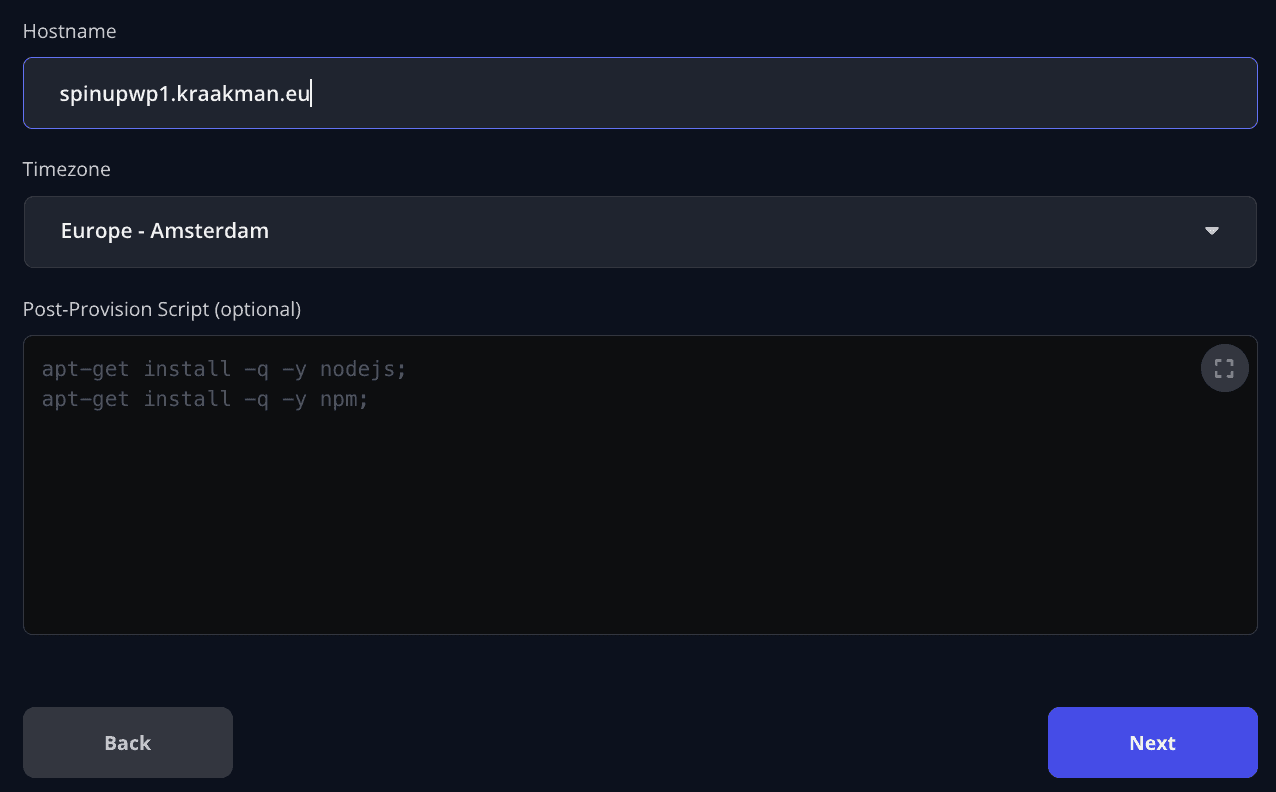
- Configure the cloud server for SpinupWP. In the following screens, enter an easily recognizable name (for example, the same as in step 5.1), choose the correct time zone (for example, Europe – Amsterdam) and save the database password somewhere safe.

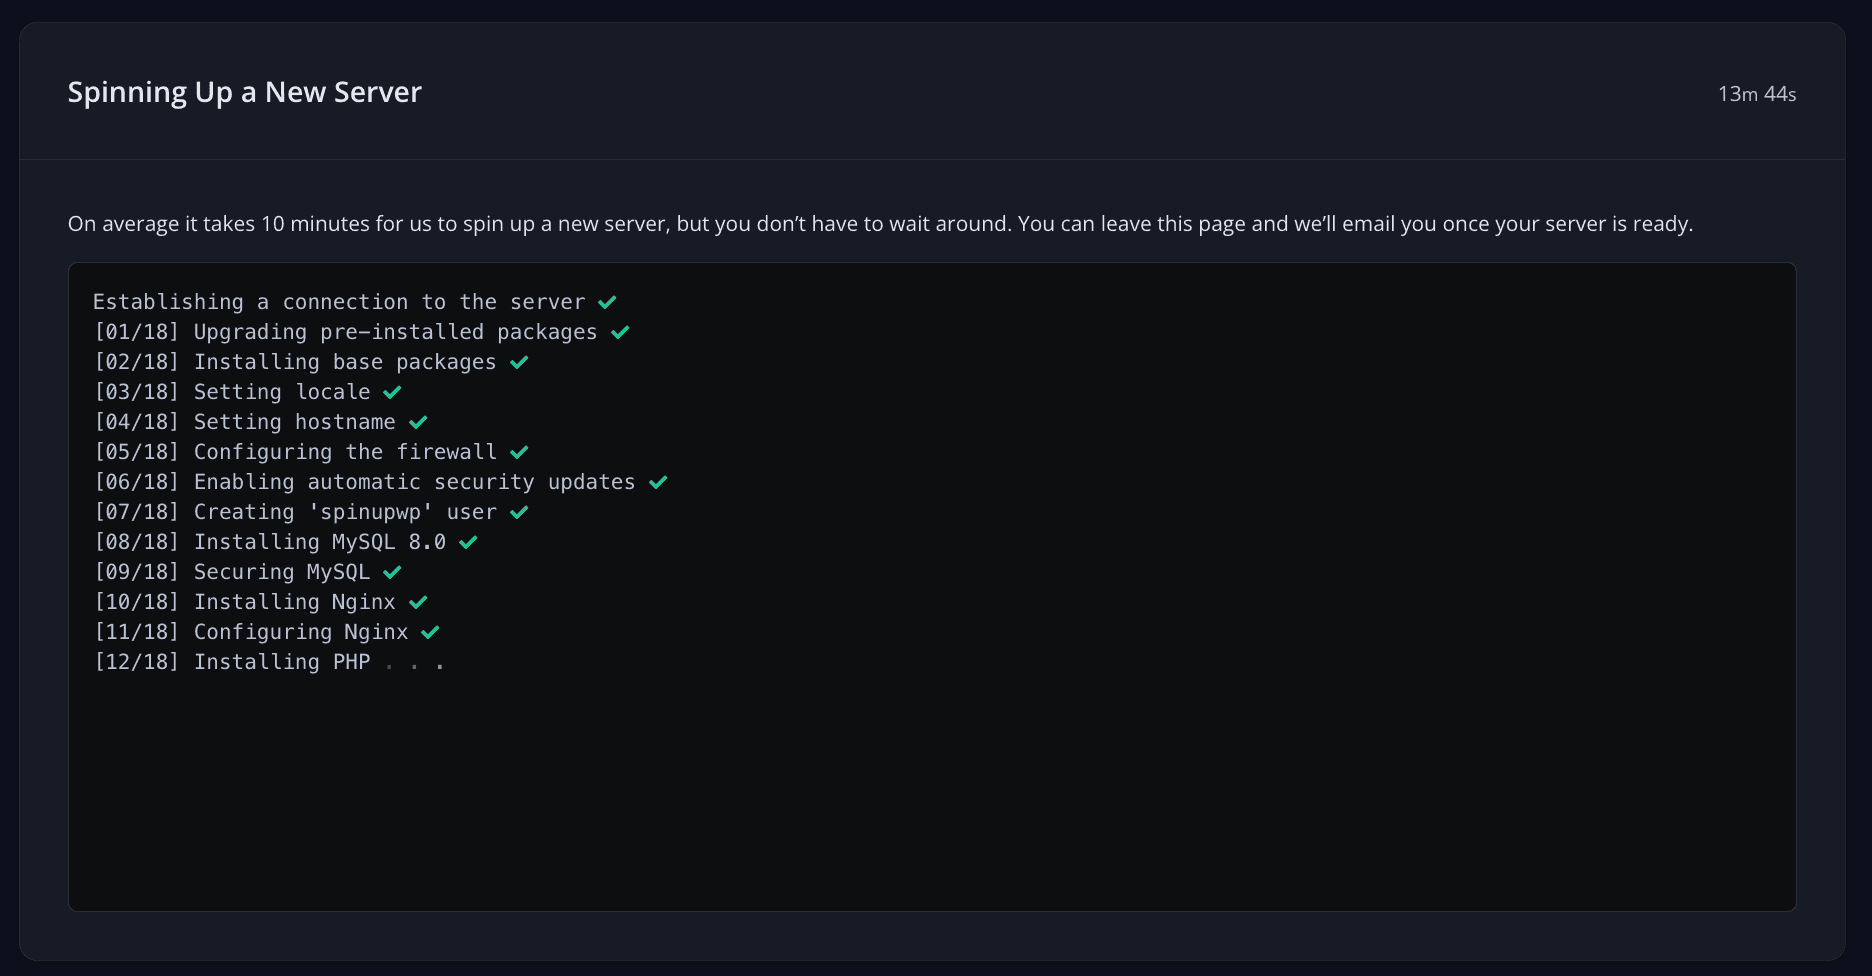
- The cloud server is configured by SpinupWP. All required software is now installed and configured by SpinupWP. This takes about 15 minutes. Time for ☕!


Adding a website to SpinupWP
Once the installation and configuration of all the necessary software is complete, it’s time to start adding a website. To do this, click the blue New Site button in the SpinupWP dashboard.
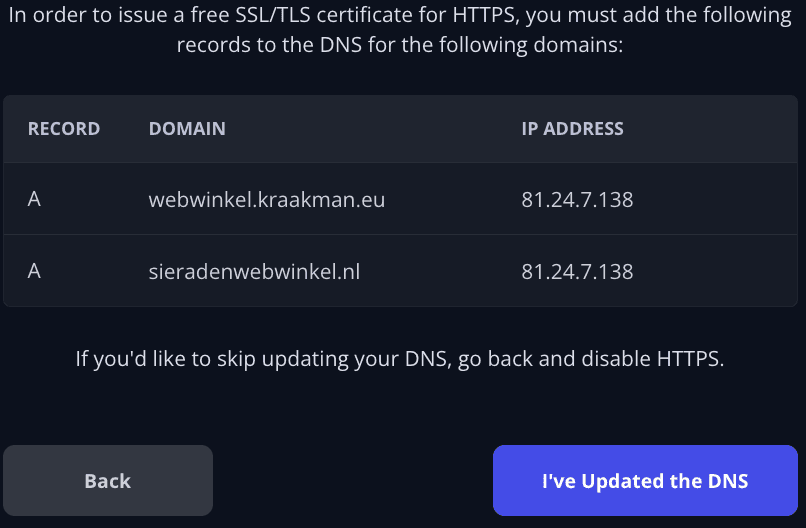
Link a domain name and activate HTTPS
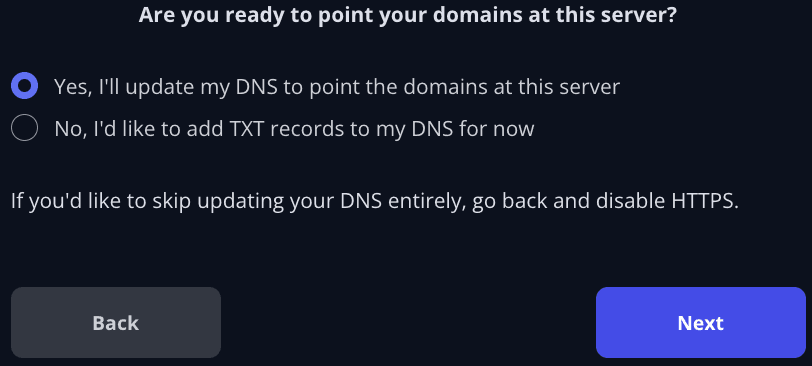
Specify the domain name or domain names on which the website will be reachable and in the step after, set up the DNS properly.
 |  |  |
Configure WordPress
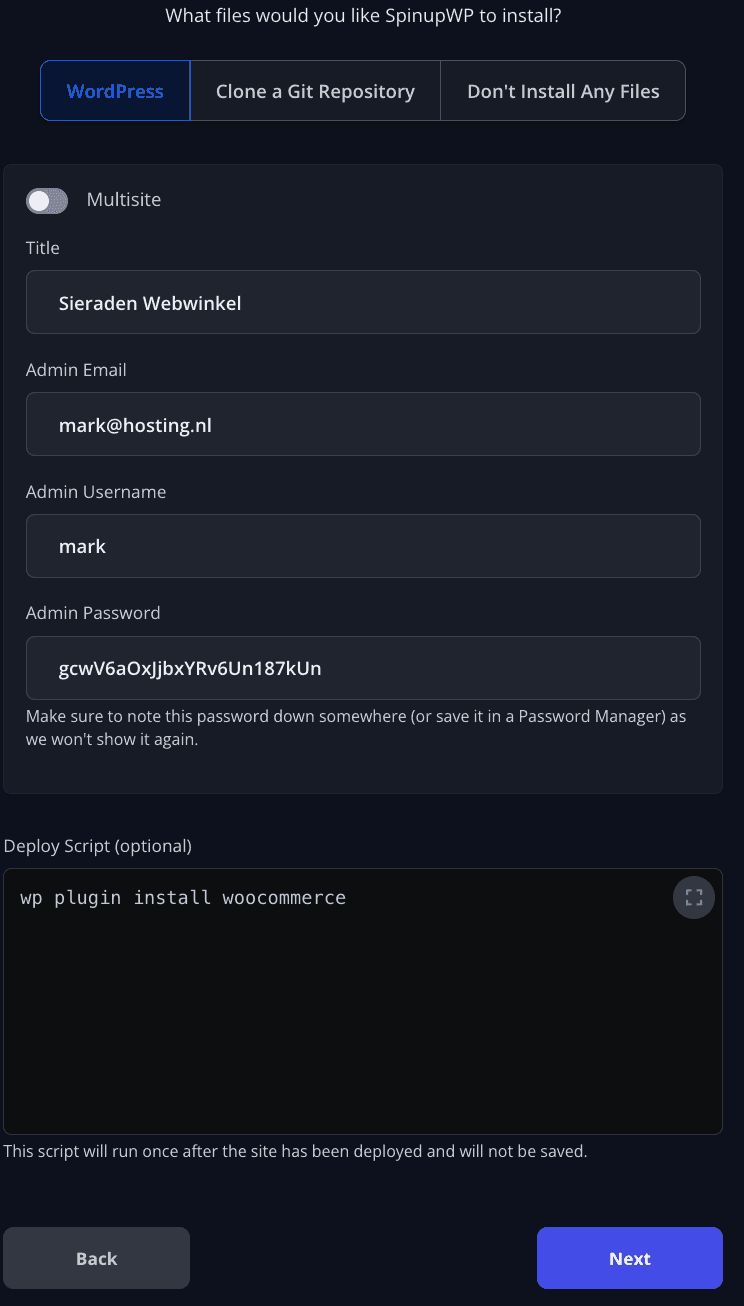
Will it be a Multisite installation? Then you can specify it here. In addition, this is the time to set the WordPress website name, admin email address, admin username and password. Of course, you can change those details at a later time. You can also choose here to load a WordPress site from Git (Clone a Git Repository) or run a post installation script.
On the database configuration page basically nothing needs to be changed (may be) and click in directly.
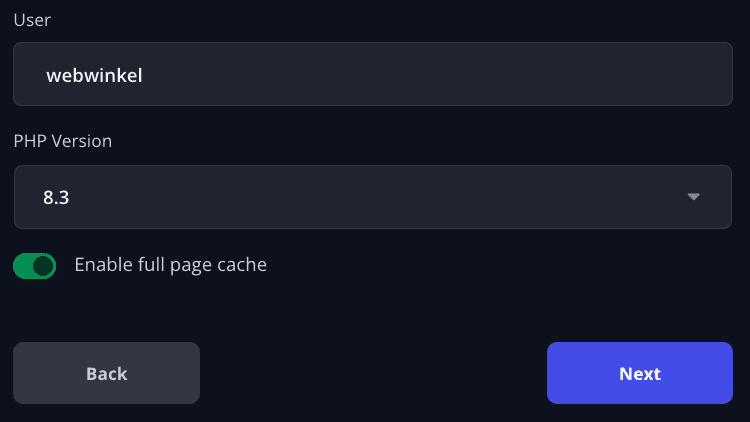
On the next page, if desired, you can change the PHP version under which the website is active and you can enable or disable full page caching. If this is a production site, I recommend leaving full page caching enabled. If this is a staging/testing site, or if performance is not a consideration, you can disable full page caching. You can always turn it on or off later.
 |  |  |
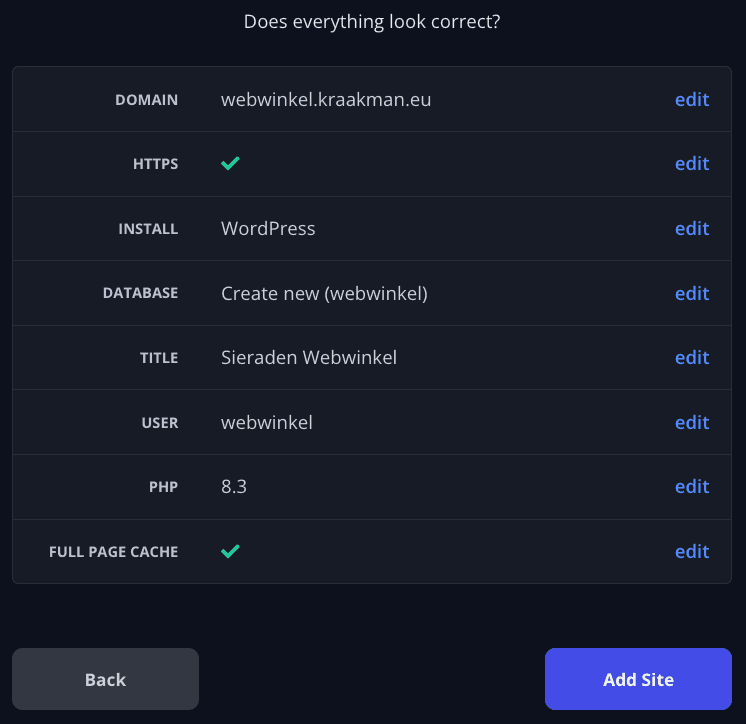
Check your choices
Check that everything is as desired, make adjustments where necessary, and then click Add Site to install and configure the WordPress website.