Testing WordPress Updates on a copy of your WordPress website
Follow the steps below to test WordPress core, plugin or theme updates on demand or automatically on a copy of your WordPress website.
Enable Smart Updates
To take advantage of this functionality, you need the Smart Updates for WordPress and PHP extension. Once the extension is enabled, follow the steps below to activate Smart Updates.
- Login to the Plesk control panel
- To do this, log in to your My Hosting account
- Click on Services
- Click on the appropriate subscription
- Click the Login button on the Plesk control panel
- Click on Update to version X

- Check Smart update (top right)

Smart Updates for WordPress is now enabled.

WordPress updates automated testing and installation
With Smart Updates enabled, you can test Updates on demand (see the section below) or test and install updates automatically.
Once Automatic Updates AND Smart Updates are both enabled, updates are automatically installed on the live website unless at least one problem is caused by an update. In that case, the update is not performed and you will receive an email with the results of the analysis and the “before” and “after” screenshot.
Read how to enable Automatic Updates for WordPress website in this article.
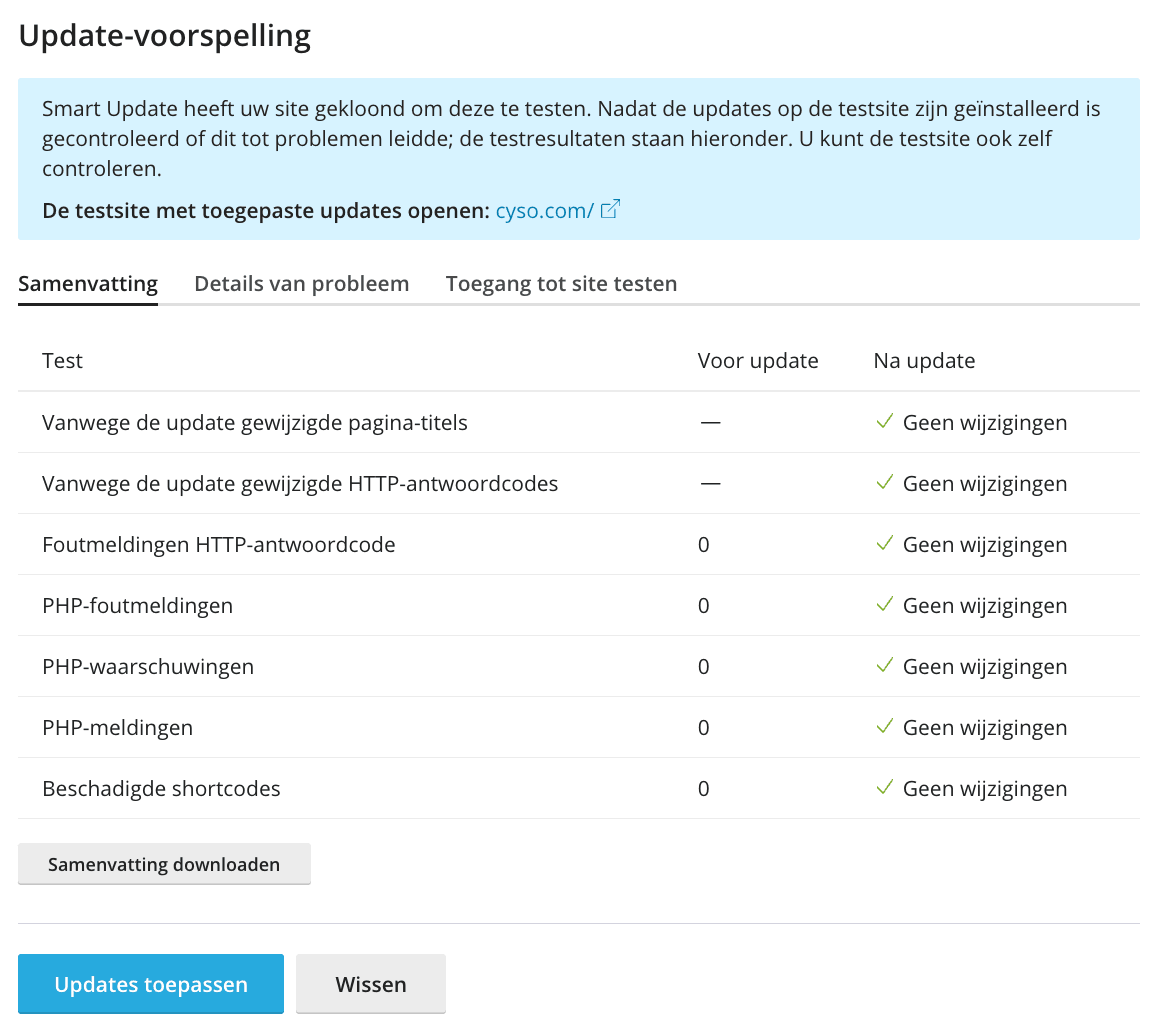
Testing WordPress updates on demand
- Select the updates you want to test and then click the button


After running the Smart WordPress Update test, an analysis can be accessed, the test site with updates applied can be viewed, and if desired, the updates can be applied to the production website.