Setting up email in eM Client
Follow the steps below to set up your email account in eM Client. You can download the eM Client e-mail program from this link and then perform the installation steps.
Setting up mail in eM Client
- Open eM Client.
- In the upper left corner of the Menu bar(eM Client), click on ‘Accounts’ -> ‘+ Add Account’.
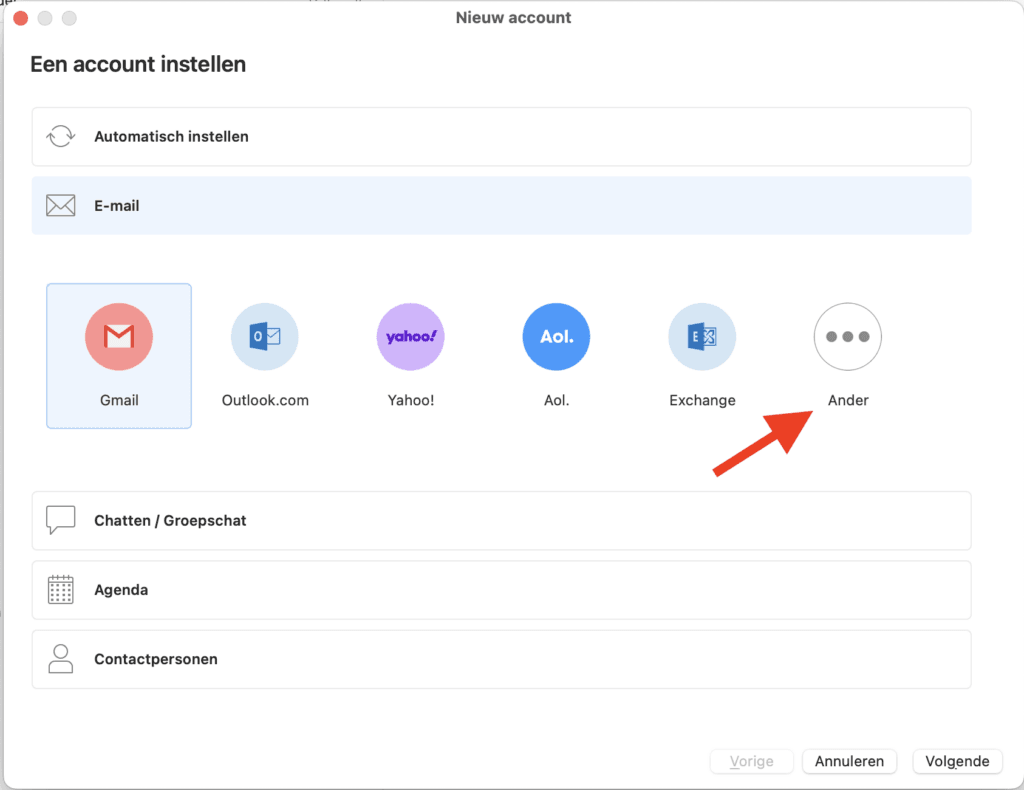
- On the“Set up an account” screen, click “E-mail.
- Select “Other” and click “Next.

1. Id. at
- Enter your email address and click “Next.
2. Incoming server
- Choose the desired protocol: POP3 or IMAP. We recommend IMAP, so e-mails are always kept on the server unless you delete them yourself.

- Under server address, enter “Incoming server. You can find this address using this link.
- Under “Authentication,” enter the following fields:
– Username: your full email address
– Password:
Have you forgotten your password? Then click on the link and follow the instructions to change your password. - Click ‘Next’

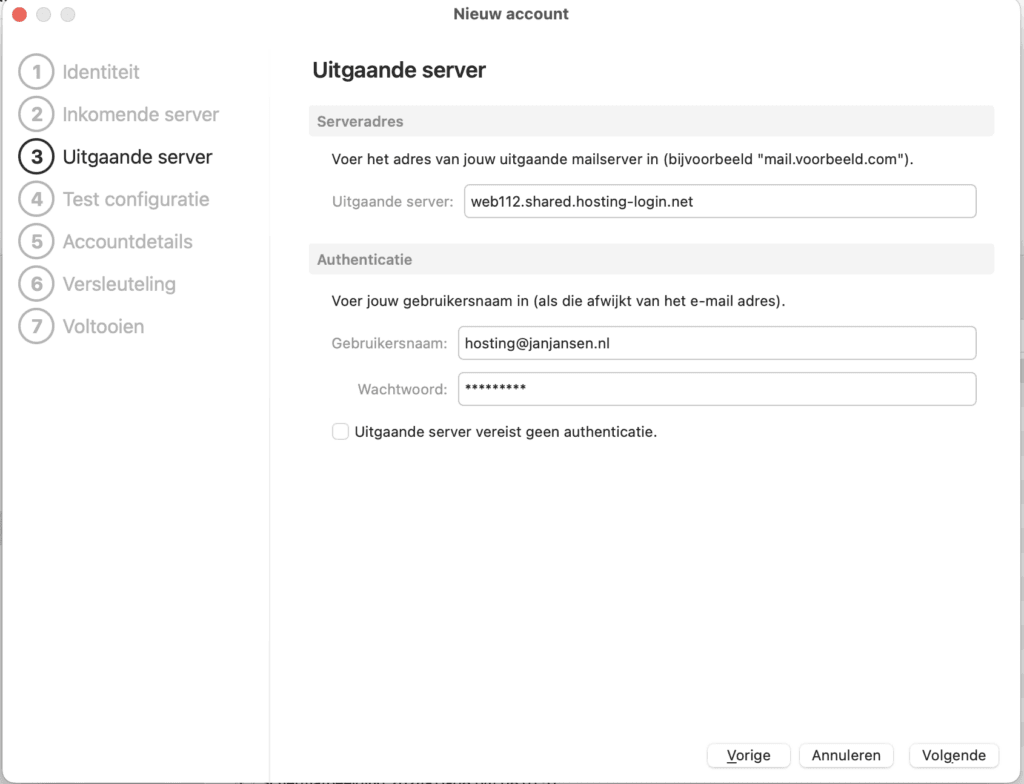
3. Outgoing server
- Enter the server address under ‘Outgoing server’.
This is the same as the incoming server. - Under “Authentication,” enter the following fields:
– Username: your full email address
– Password: - Leave the ‘Outgoing server requires no authentication’ checkbox blank and click ‘Next’:

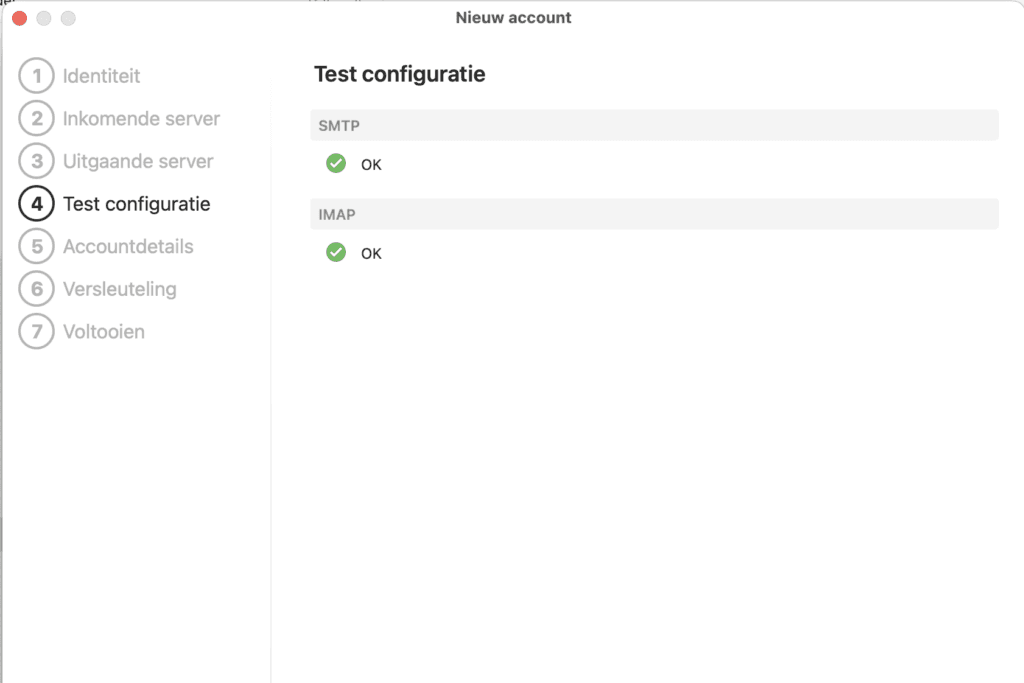
4. Test configuration
- If all information is entered correctly, you will see ‘OK’ with two green checkmarks under SMTP and IMAP. Then click ‘Next:

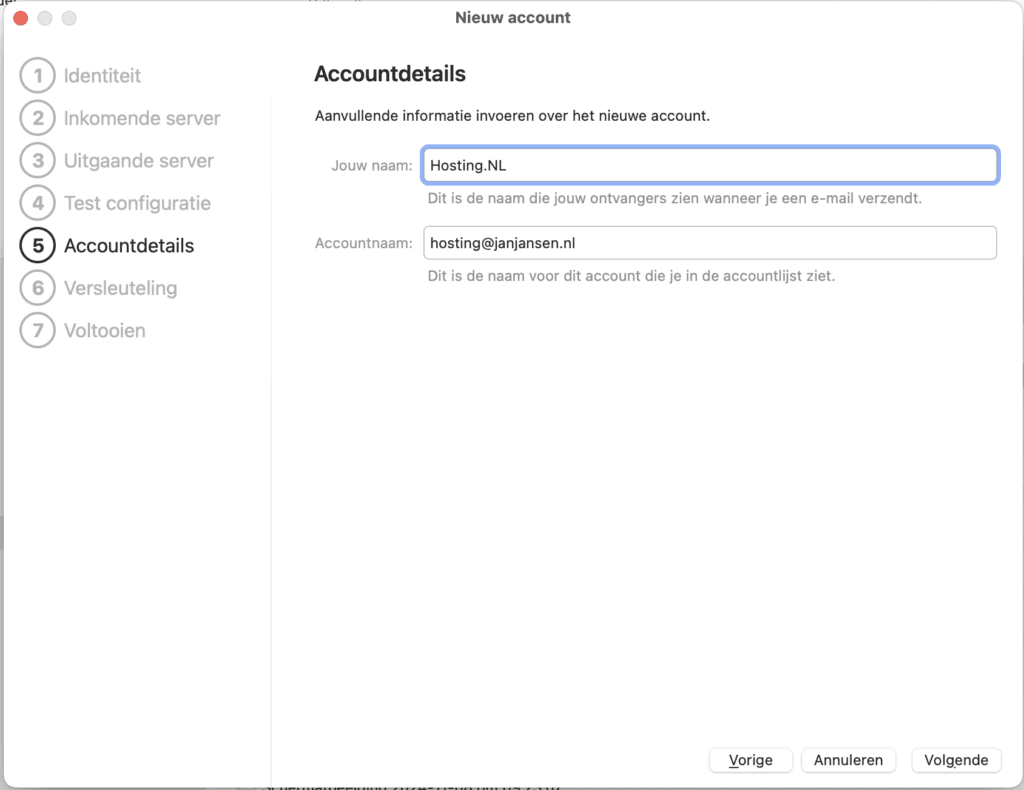
5. Account details
- Enter the name you want. You can enter this yourself
- Enter your account name. This can be your full email address and click “Next.
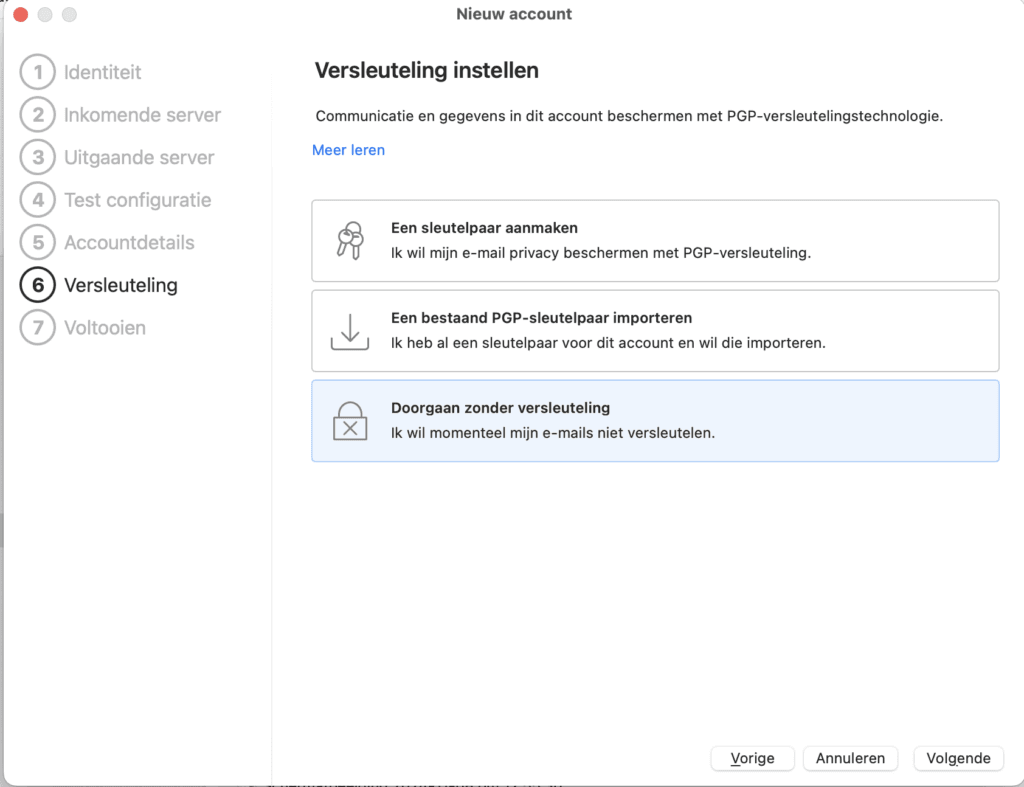
6. Encryption
- You can set the encryption as you wish. If you don’t want to use it, select “Continue without encryption” and then choose “Next.

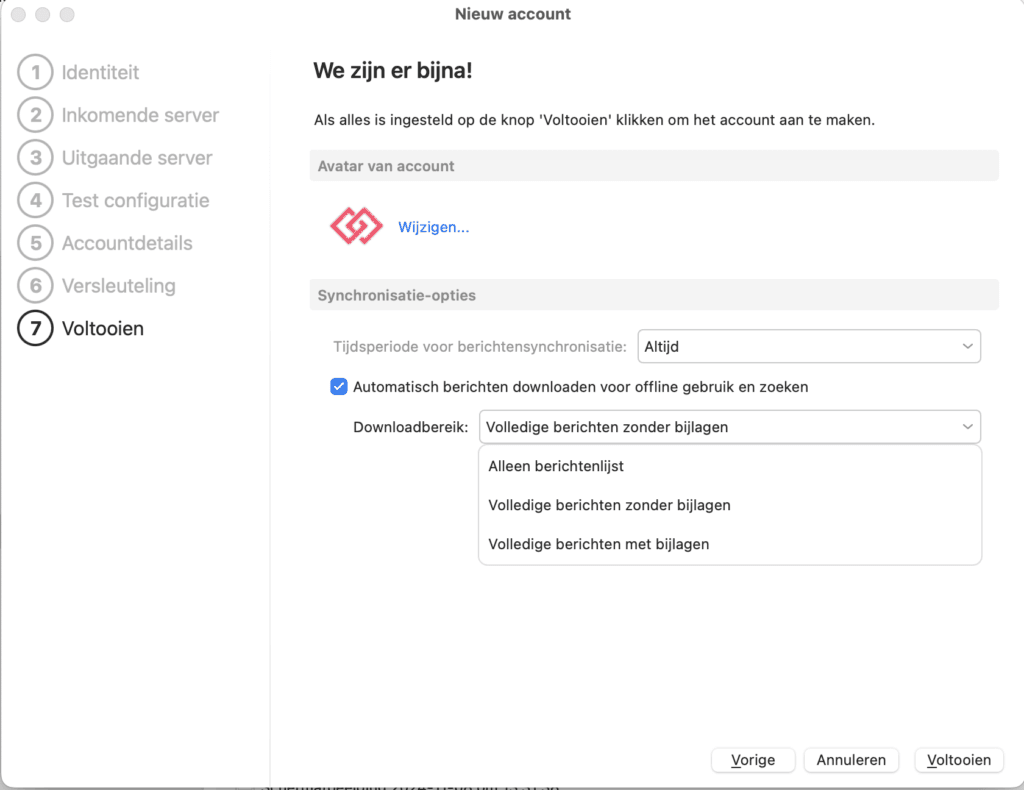
7. Complete
- In the last step, you can upload an avatar and possibly activate the option to automatically download messages for offline use. If you don’t want this, uncheck it.
- Then click ‘Finish’ to complete the configuration:
.
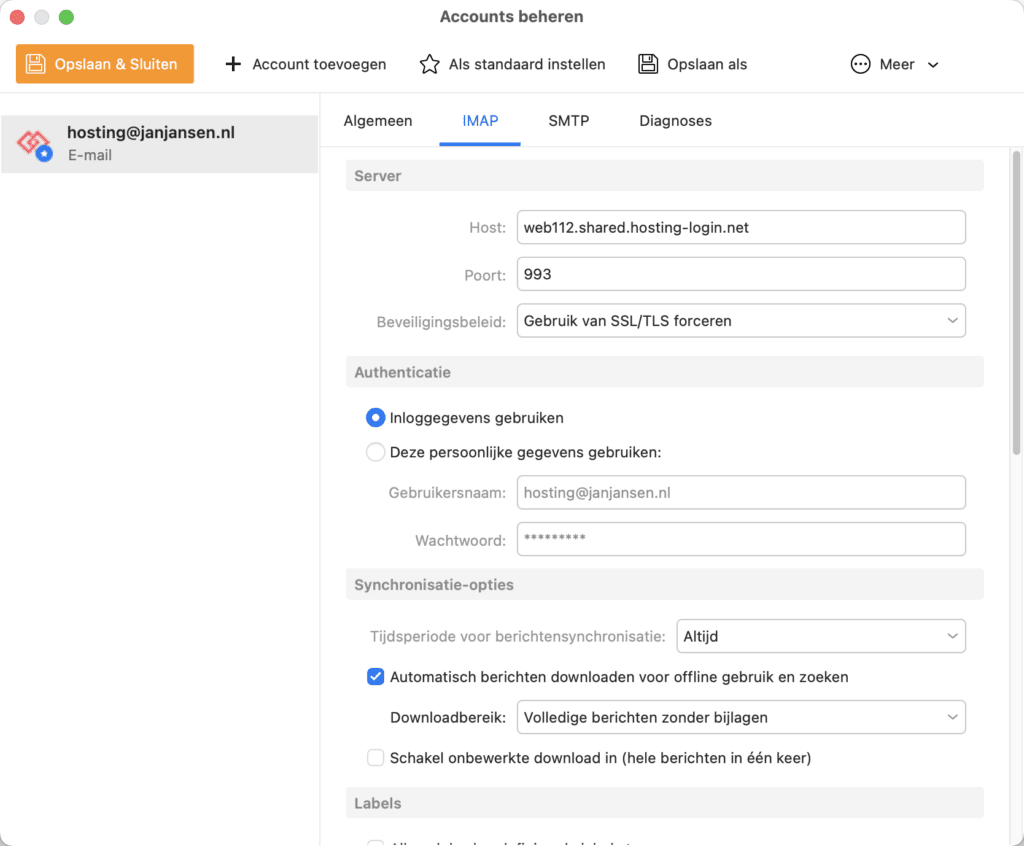
Changing ports
- Click Menu in the upper left corner and select Accounts.
- Click in the menu on ‘IMAP’ or if state POP3 is on POP3, adjust the port for incoming mail to 993 (for IMAP) and 995 (for POP3)
- The security policy must be set to “Force use of SSL/TLS.

- Then click on ‘SMTP’ the outgoing port should be either 465 or 587
- The security policy must be set to “Force use of SSL/TLS.

- Click “Save & Close” in the upper left corner.
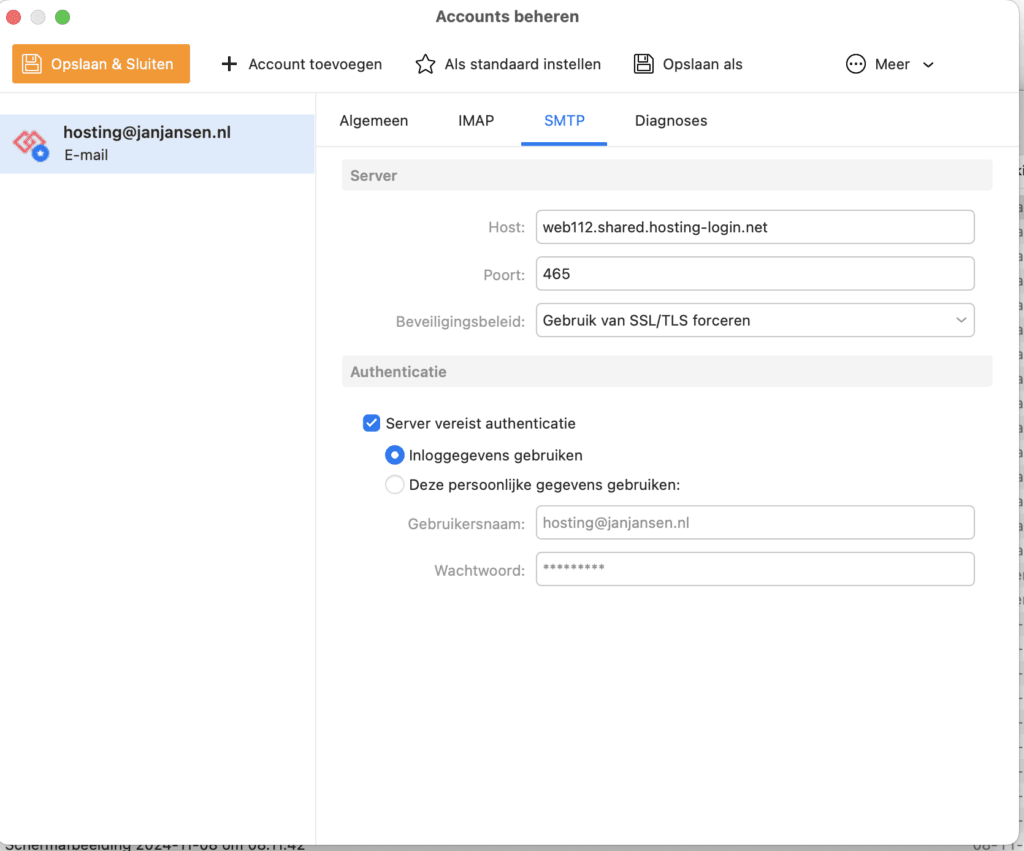
The account has now been successfully added.