Recommended settings for Superfast Hosting for WordPress
To take full advantage of our Superfast Hosting for WordPress, we recommend activating the settings below. Does this concern an entirely new website? Then you can proceed directly to step 4.
Step 1: Clean up other cache plugins
Only applicable to existing websites:
Superfast Hosting for WordPress has its own Cache plugin. For that reason, it is necessary to clean up other caching plugins…. Remove existing caching plugins such as WordPress Cache plugins like WP Super Cache, WP-Optimize or WP Rocket
Step 2: Restore the default .htaccess file
Only applicable to existing websites:
Replace the .htaccess file with the WordPress default: https://wordpress.org/support/article/htaccess/
Step 3: Install the ‘LiteSpeed Cache’ plugin for WordPress
Only applicable to existing websites:
Install the ‘LiteSpeed Cache’ plugin
- Log in to the Plesk control panel
- Click on “WordPress.
- Click on ‘Plugins’
- Install and Activate the ‘LiteSpeed Cache’ plugin
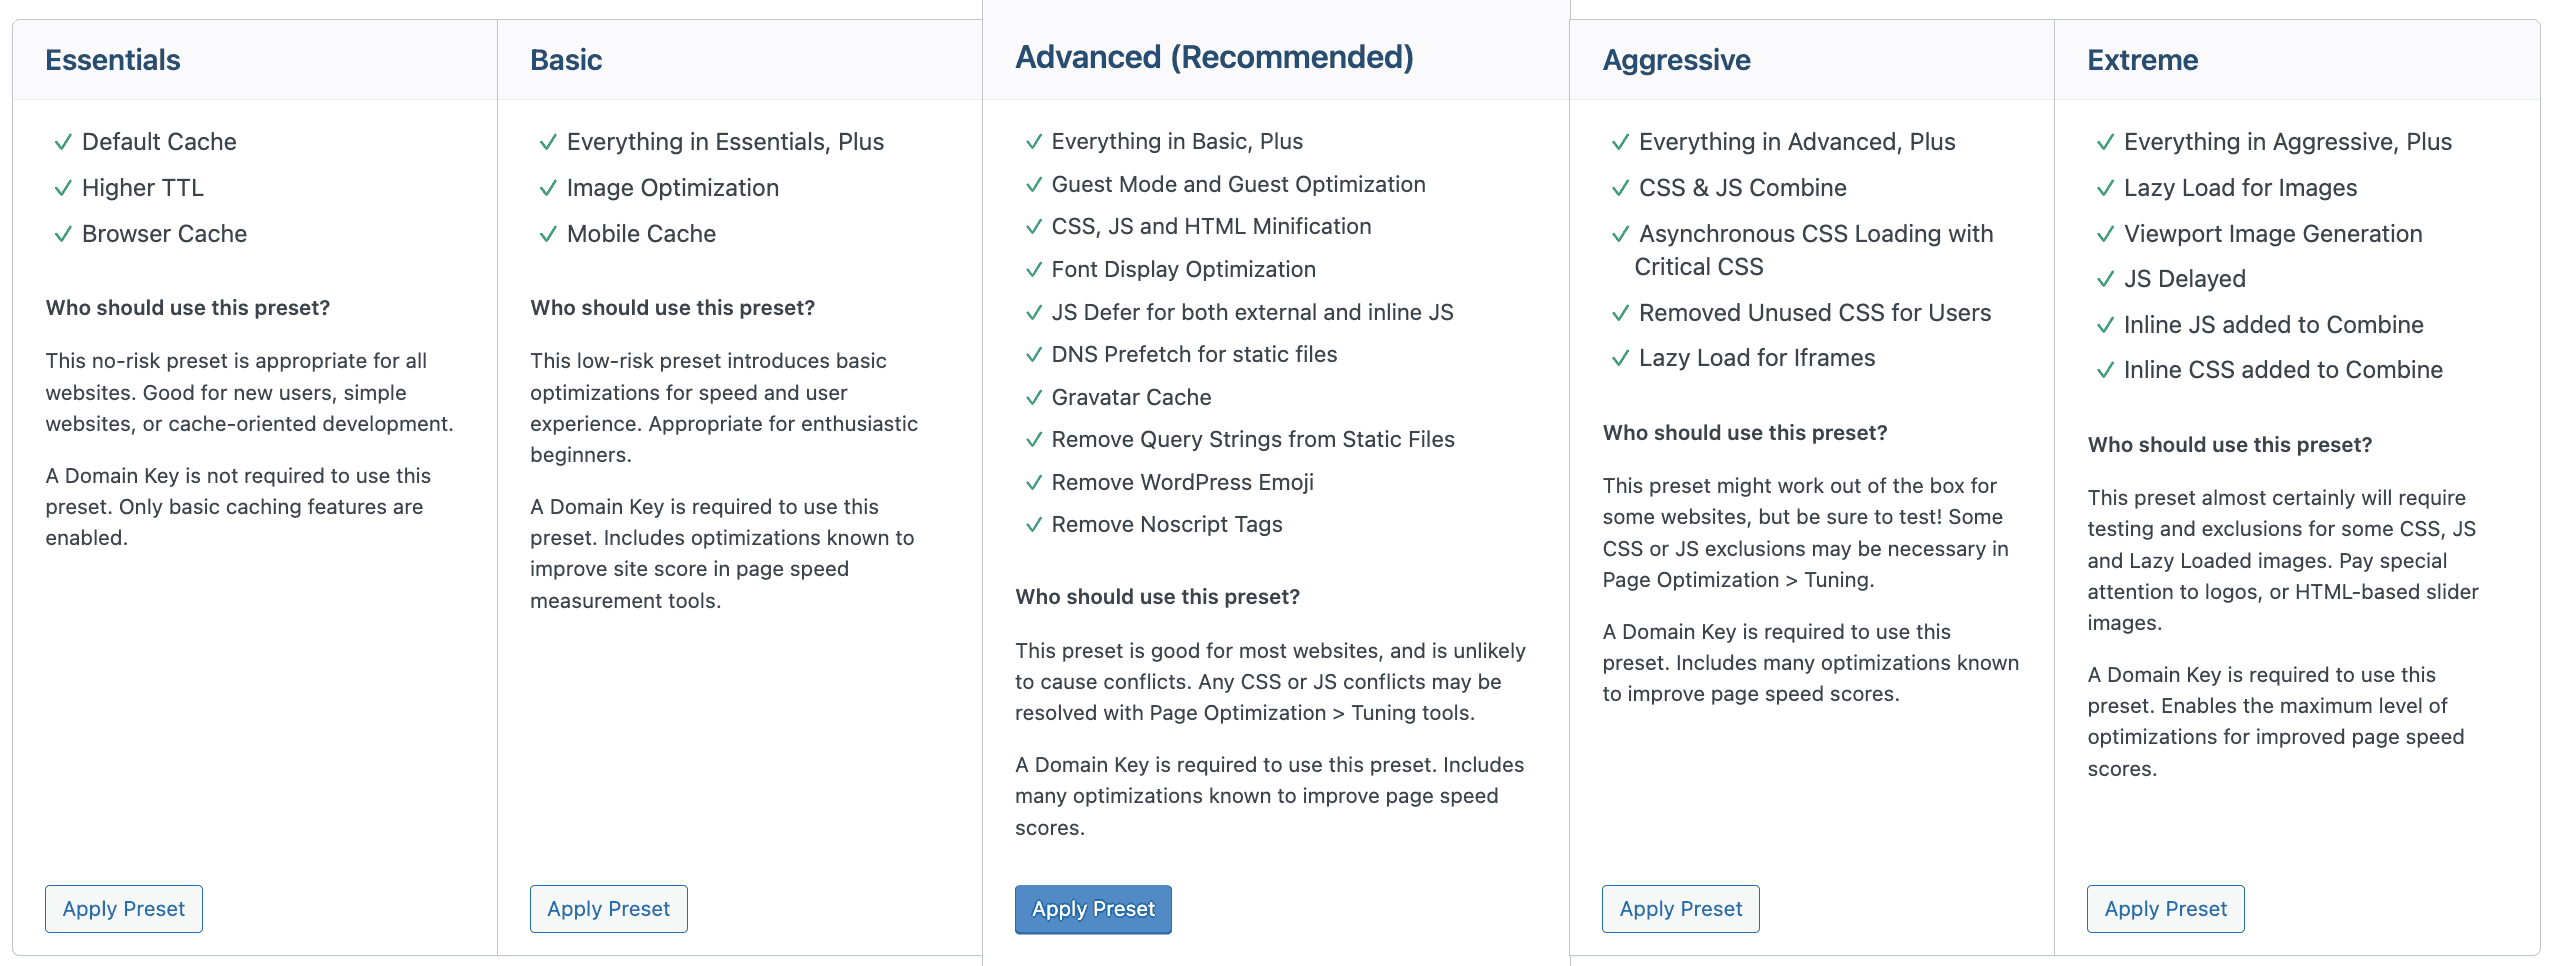
Step 4: Choose the right optimization profile
There are five preset profiles available to choose from to speed up your website. Go for no risk with the Essentials profile, go for extreme optimization with the Extreme profile or choose something in between. After setting it up, test the website properly and if necessary, choose another optimization profile.
- Log in to the WordPress Dashboard
- In the menu, click LiteSpeed Cache and then click Presets.
- Under the desired optimization profile, click Apply Preset.
- A good starting point is the Basic profile.
Step 5: Activate Redis Object cache
In the WordPress Dashboard, click LiteSpeed Cache and then Cache
Change the following settings on the Object tab:
- Object cache: ON
- Method: Redis
- Port: 6379
- Now click Save Changes
Step 6: Activate the Crawler
Cache expires after a certain amount of time. To reduce the chances of a visitor seeing an uncached page, activate the Crawler. The Crawler periodically visits the pages of your website to keep the Cache active.
- In the WordPress Dashboard, click LiteSpeed Cache and then click Crawler
- go to the General Settings tab
- Set Crawler to ON
Step 7: Reset the cache
- In the WordPress dashboard, click LiteSpeed Cache and then Toolbox
- Click Empty Entire Cache / Remove All Cache
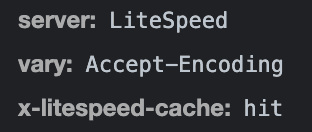
Now visit the website at least twice. The first time the cache will be generated and from the second time you will be served a fast website! Want to know if things are going well? To do so, take a look in the Developer Tools, Network tab and click the top result. You should see this:
Tips
- Visit our article with Helpful Tips for Superfast Hosting for answers to frequently asked questions
- Prevent large images from negatively affecting load time and use these steps to compress all images automatically.