Getting started with Webhooks
Webhooks make it possible to link all kinds of follow-up actions to certain events. For example, you can automatically get a message in Slack, Teams or Discord as soon as the transfer of a domain name is completed or receive notification when domain names are registered in your own account, or in a client’s account. Webhooks also allow you to put services like IFTT and Zapier to work to update your own records or start a particular automation.
A Webhook can be invoked in response to the following events:
- once a domain name is registered
- as soon as an incoming domain name transfer is completed
- once an inbound domain name transfer has failed.
This is how to create a Webhook
- Log in to your My Hosting account
- Click on your name at the top right and then on Manage webhooks
- Click on New Webhook
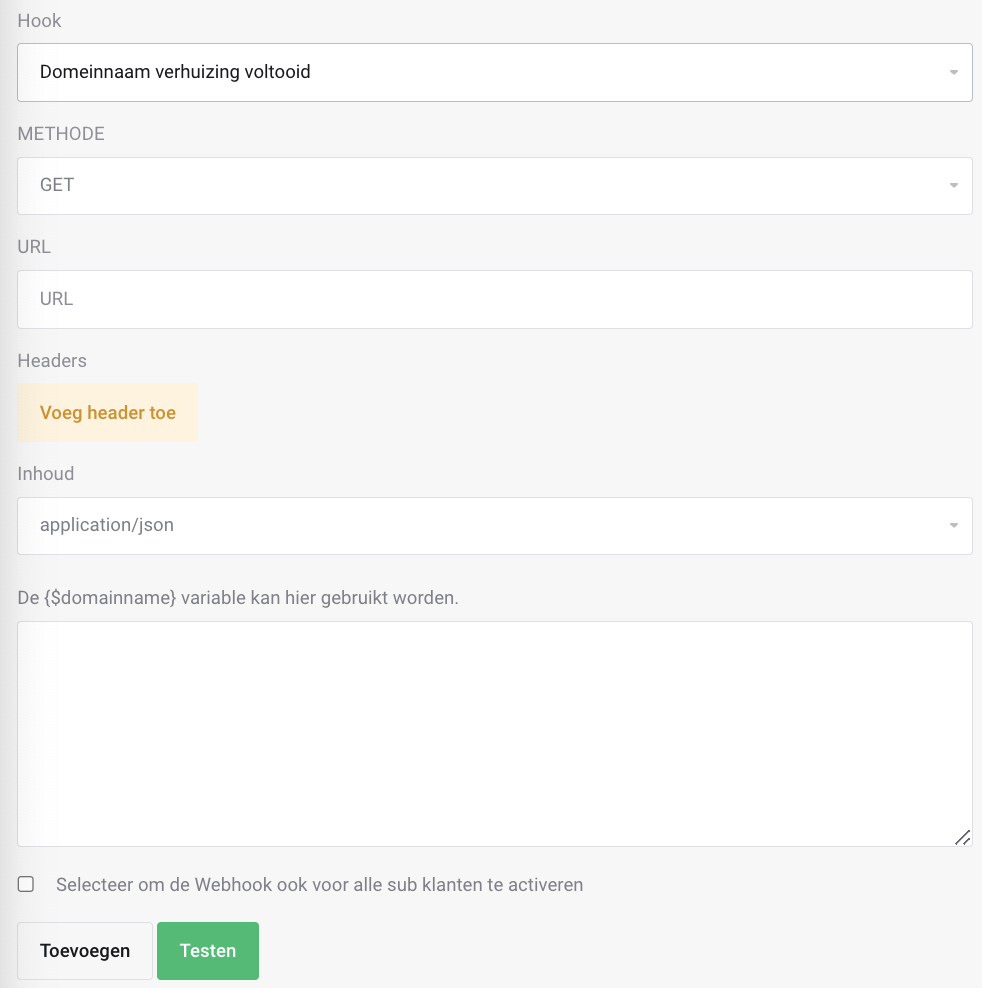
- Then enter the following information:
- the action for which you want to create a Webhook
- Domain name transfer completed
- Domain name registration completed
- Domain name transfer failed
- Which method the Webhook should use
- You have the choice of GET, POST, PUT, PATCH, DELETE
- You use for Slack and Teams POST
- the URL to be called, for example:
https://hooks.slack.com/services/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 - any additional HTTP headers you want to add
- This is optional. For example, HTTP headers may be required if additional authentication is needed
- select the appropriate Content-Type for the content of your Webhook
- application/json
- application/xml
- application/x-www-form-urlencoded
- the contents of your Webhook. An example for Slack:
{"text":"Hello, World! Er is iets met {$domainname}"} - if your account has the appropriate permissions, you can choose to enable the Webhook for all subclients if desired
Click Test to test the Webhook or Add to save the new Webhook.

