Help! My WordPress website has been hacked
A hacked website, it really can happen to the best of us. Follow the steps in this guide to clean up your website, update all software to the latest version and activate all recommended security advisories.
This manual consists of the following sections:
- Disable the website
- Remove all peculiar Roast tasks
- Ask us to stop all ongoing processes for the website
- Scan and restore website with ImunifyAV
- Reinstall the WordPress “core”
- Update the PHP version to the latest version
- Update WordPress core , plugins and themes
- Activate all automatic forced updates
- Activate all safety advisories
- Turn the website back on
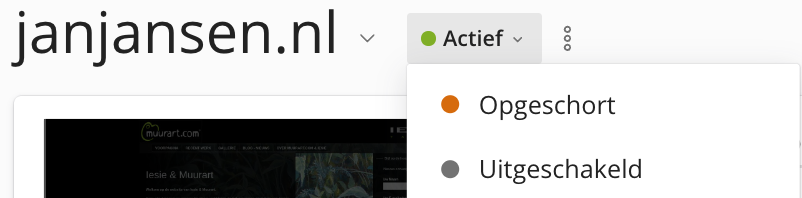
Step 1: Disable the website
If the website is already disabled, proceed to step 3.
If the website is not already disabled, disable the website. In Plesk, find the website in question and change the status to Suspended.
Step 2: Remove all peculiar Ingrid tasks
A hacked Web site may have placed a scheduled task on the server environment that makes it impossible to clean up a hack.
To check the Scheduled Tasks, click Scheduled Tasks in Plesk. If you come across one or more scheduled tasks like the one below, select the task or tasks and delete them.

Step 3: Ask us to stop all ongoing processes for the website
If we have disabled the website for you, you can proceed directly to step 3.
A hacked website may keep a process in use on the server environment that makes it impossible to clean up a hack. For this reason, it is important that you contact us to ask us to stop all running processes for the website.
Step 4: Restore the website with ImunifyAV
The task now is to clean up the hack. To do this, open the ImunifyAV program in Plesk by clicking the ImunifyAV button. Then click on the Clean Malware button on to clean all infected files.
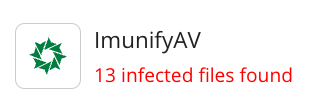
Now that the hack has been cleaned up, we are going to make sure that the same thing cannot happen again soon.
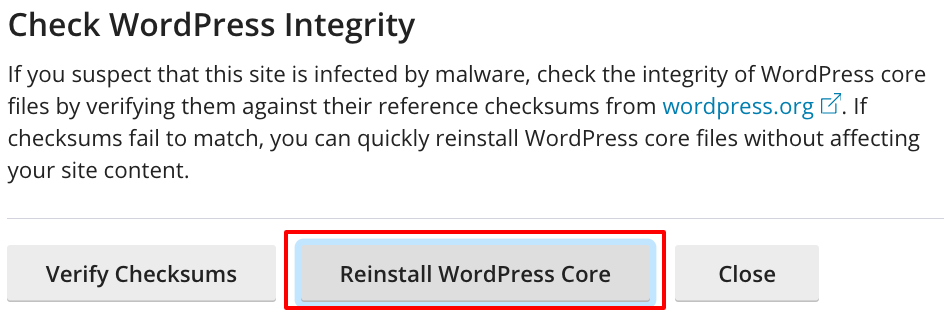
Step 5: Reinstall the WordPress “core”
To restore the integrity of WordPress, we are going to reinstall the core of WordPress. Do not be alarmed, this will not interfere with the operation of the website.
In Plesk, click WP Toolkit, open the appropriate website if applicable, and then click Check WordPress Integrity. Then click Reinstall WordPress Core.
Step 6: Update the PHP version to the latest version
In Plesk, click WP Toolkit and, behind PHP, click Details and then Open PHP settings.
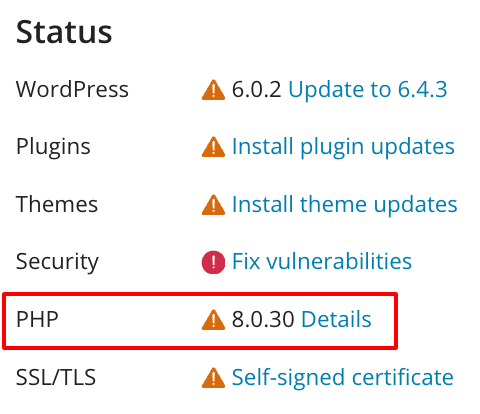
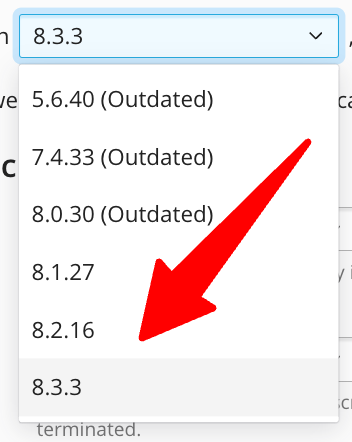
In the subsequent screen, change the PHP version to the latest version with the highest number. Then click OK at the bottom of the page to save the changes.
Step 7: Update WordPress , all plugins and all themes
To make sure that your WordPress website, all plugins and themes are less susceptible to being hacked in the future we are going to install all available updates and make sure they stay up to date in the future.
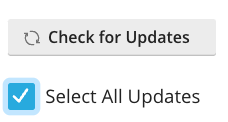
In Plesk, click WP Toolkit, open the appropriate website if applicable, then click Updates and then Check for Updates.
After the check for new updates is complete check Select All Updates and then click the blue Update button.
Then click Autoupdate Settings and check Yes, all (major and minor) updates under WordPress automatically update and check Required under both Plugins and Themes.
Step 8: Activate all security advisories
In the WP Toolkit, click Fix Vulnerabilities and then click Security Measures. Now check all Security Measures and then click Secured.

Step 9: Resolve remaining vulnerabilities
In the WP Toolkit, click on Fix Vulnerabilities again and then on Scan. After the scan, review the reported issues and then fix the outstanding ones.
A common problem concerns old plugins that can no longer be updated. This can happen, for example, if a plugin is no longer being further developed by the vendor. Such plugins pose a security problem and should be disabled and/or replaced. Do not leave plugins active.
Step 10: Re-enable the website
After all the steps have been completed, the website can be enabled again. To do so, change the status of the website back to Active in Plesk.